
Bi-fold doors are a great choice when space is tight. They can also become an excellent asset to your home décor.
And if you’ve read our extensive bi-fold door buyer’s guide, by now you’re fully aware of the different types, sizes and materials. But perhaps you might be wondering, are bifold doors easy to install?
You’ve come to the right place. Our step-by-step guide on how to install a bi-fold door will answer all your questions about fitting bi fold doors.
Here’s what we have in store for you.
Table of contents
- How are bifold doors supported?
- Do I need a structural engineer for bi fold doors?
- Do you need planning permission for bifold doors?
- How much does it cost to install bifold doors?
- How to install bifold doors
- How to fit internal bifold doors
- How to install external bifold doors
- Make bifold door installation your next home improvement project
How are bifold doors supported?
There are two main types of bi-fold doors – top-hung and bottom-rolling. The weight in the top-hung type is at the top of the frame, and they utilise a beam overhead or lintel to support the weight of the wall.
Bottom-rolling ones tend to be easier to operate and don’t need any overhead support because the weight is at the bottom.
Do I need a structural engineer for bi fold doors?
You must hire a structural engineer if you’re considering corner bifold door installation. They will survey your property and assess whether it’s structurally sound for this project.
However, you don’t need to hire a structural engineer if you intend to install smaller bi-folding or patio doors, as long as these aren’t as wide as the existing structures they will replace in due course.
Do you need planning permission for bifold doors?
You need planning permission whenever you’re making a big change to your house, which generally isn’t the case when installing bi-fold doors. That being said, you should bear in mind that there are some restrictions involving conservation areas and listed buildings that might affect you.
As a rule of thumb, always make sure you check with your council before embarking on a major home improvement project just to be on the safe side. Getting planning permission may take you as long as 12 weeks, so it’s important to plan well ahead.
How much does it cost to install bifold doors?
A bi-fold door itself can set you back between £1000 and £8000, depending on the type (external or internal), size (large or small) and material (aluminium, timber, composite or uPVC). The installation price also varies depending on size, material and where you live.
The question is:
How much to install bifold doors?
Here’s the deal:
If you’re unsure of how to fit bifold doors and decide to hire a professional, the average cost of installing a small 2.7-metre aluminium bi-fold door is £650. That figure goes up to £1000 for a large 4.7-metre aluminium door. Follow the link provided to get a custom price for installing bi-fold doors in your area.
Naturally, you only need to factor in the price of the door itself if you’re willing and able to take on the project of fitting bifold doors yourself.
Speaking of which…
How to install bifold doors
Now that we’ve taken care of the preliminaries, it’s time to take a deep dive into the bifold door installation process for both internal and external bi-fold doors.
Keep in mind that the exact steps might differ slightly from one manufacturer to the next.
So, always read the supplied installation guide carefully before you begin.
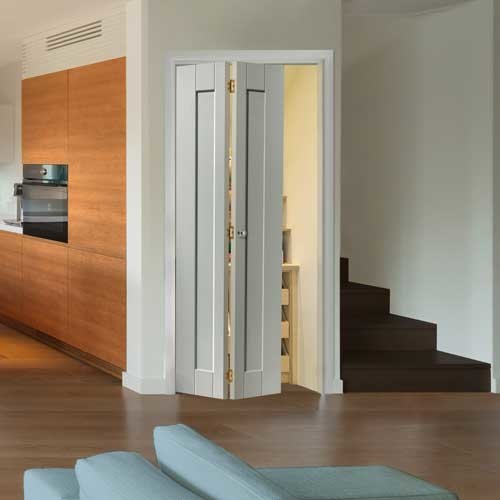
How to fit internal bifold doors
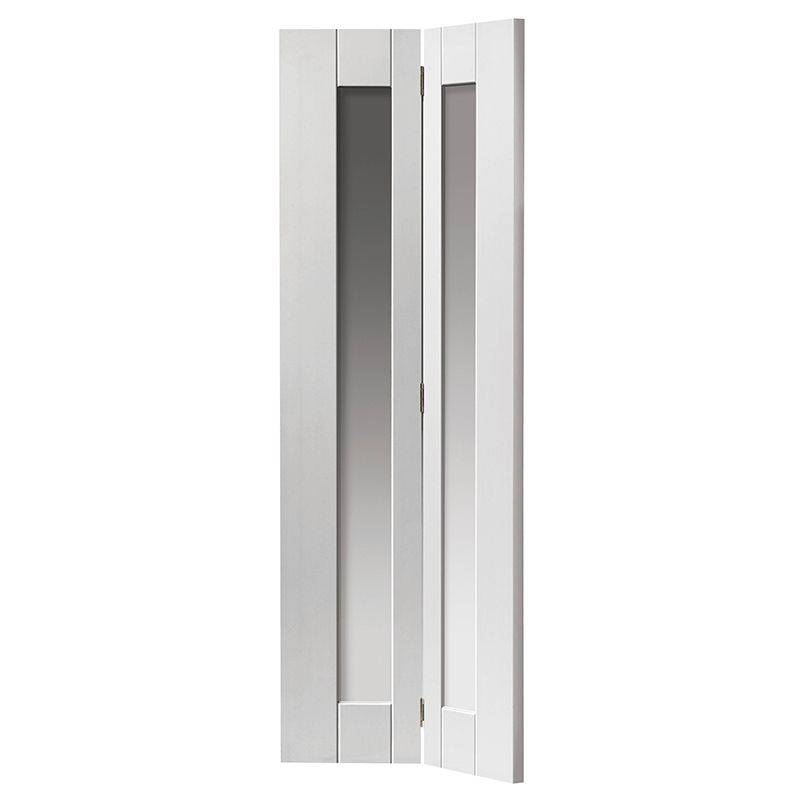
Start by measuring the width and height of the door opening. In general, bi-fold doors are designed to be smaller than the frame to allow for the track and fittings. The height ought to be around 40mm less than that of the door opening, while the width should be around 13mm less.
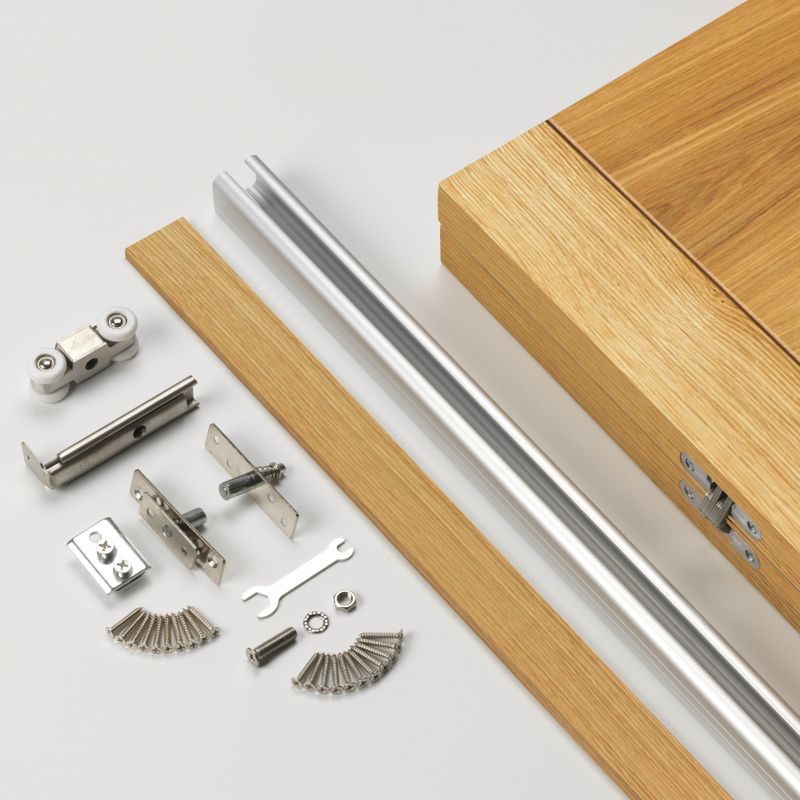
Once your kit has arrived and you’ve unpacked everything, make sure you have the following tools handy:
- Electric drill with appropriately sized drill bits
- Measuring tape
- Pencil or marker
- Screwdriver
- Hammer
- Step ladder
- Safety glasses
All set? Let’s find out how to install a bi-fold door inside your home.
Step 1: Fit the top bi-folding door track
You need to fit the track in the centre of the door frame at a specified distance from the front edge. Using your measuring tape, measure and mark the location on the two sides of the frame. This is where you’ll need to drill holes and screw the track securely into position.
Step 2: Fit the door jamb bracket on the bottom
Using the drill, fix the bracket simultaneously to the door jamb and the floor. Carefully place the top and bottom pivots into the pre-drilled holes in the top and bottom of the bi-fold door on the side that’s going to close.
Step 3: Fit the door itself
Fold the door and lift it into the track, placing the top pin pivot into the hole. Then, place the bottom pivot firmly into the bottom pivot bracket. Now, you can check the fit of the door and make sure it slides along the track without any glitches.
At this point, you might have to do some vertical adjustment by screwing the bottom pivot up or down or horizontal adjustment by altering the track bracket position. Finally, fix the spring closer to the top track on the closing side.
Do you still feel like something is missing?
You might be right!
If you’d like to fit a door knob or handle or other bi-fold door hardware, head over to our in-depth step-by-step guide.
This is the internal bifold door fitting taken care of.
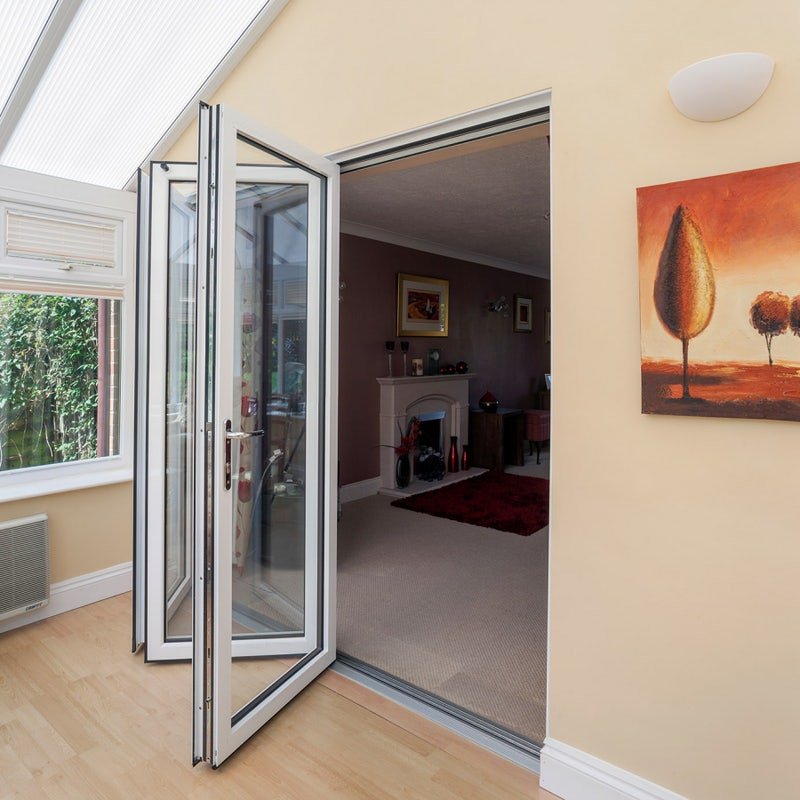
How to install external bifold doors
External bifold doors are usually larger than internal ones, so this is a somewhat more demanding DIY project. Nonetheless, a seasoned DIYer is perfectly capable of completing it.
Now:
Measuring for external bifold doors is similar to measuring for internal ones.
Once your bi-fold door mechanism kit has arrived and you’ve ensured everything is in good working order, here’s what else you’ll need:
- Electric drill & drill bits
- Spirit level
- Measuring tape
- Screwdriver
- Step ladder
- Allen key
- Safety glasses
Keep in mind that, as with internal bi-fold doors, the process will vary slightly for each model. So, always read the installation guide carefully before getting to work.
Having said that:
Here’s how to install a bi-fold door to connect better to your garden or patio.
Step 1: Assemble the frame
Lay out the door frame in a square and apply silicone at the end of each jamb. Then, align the jambs with the bottom rail. Using either an electric or manual screwdriver, fix the frame into place with the provided screws.
Next, seal both ends of the bottom rail and the top of the jamb with silicone.
Step 2: Assemble the mechanical corner cleats
You should be able to push-fit these bifold door details together without any hassle. Then, insert the corner chevrons into the head of the frame, followed by the corner cleats.
Step 3: Align the mitred corners
Depending on the size of your door, you might need an extra pair of hands to do this. Check to make sure the cleat bullets are in the correct locations, and you can actually see them.
Step 4: Tighten at the side and bottom
Most kits come complete with an Allen key, which you should use for this step. Next, wipe off any excess silicone to keep everything tidy.

Step 5: Fit the frame gasket seal into the door frame
Starting with the bottom frame, insert the seal gasket into the groove. Do this continuously across the frame head and the jamb. Be extra careful not to cut it.
Congratulations! You’re halfway there. Go ahead and set the assembled frame aside.
Step 6: Measure the width and height of the door opening
Do the same for the diagonals. Next, use a spirit level to make sure the sill is level and flat.
Step 7: Put the packers into place
The first one should go directly under the location of the frame jambs. Place the remaining packers at the intervals specified in the installation guide.
Step 8: Fix the sill and head
Drill holes at the recommended locations and screw the sill into place with the provided screws. Then, put silicon at the two ends and along the length of the sill and place the door frame on top.
Place packers to hold the frame firmly in position, drill holes and screw in the frame, checking the jamb is still level as you go along.
Step 9: Mount the doors
Lift the first door into place and fix the hinges. Mount the second door and connect its hinges to those of the first one. If your bi-fold door fitting kit happens to have a third door, continue in the same way.
And that’s how to install a bi-fold door! All you have to do now is fit the handles.
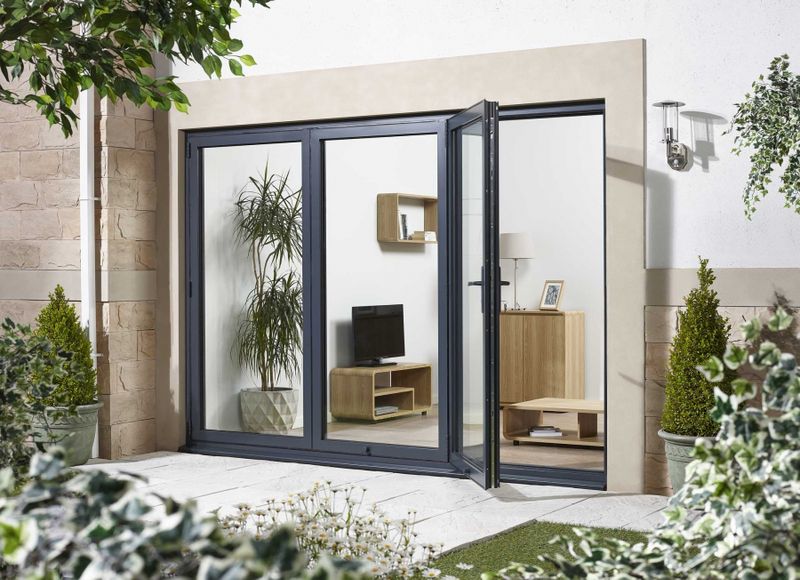
Well done! You’ve successfully installed your new external bi-fold door and made the patio an extension of your home!
Make bifold door installation your next home improvement project

And there you have it – everything you need to know about how to install a bi-fold door. Bi-fold doors are a versatile, space-saving solution that you should definitely consider for your home.
So, are you going to try installing bifold doors yourself for your next home improvement project?
Was this guide useful?
Mentioned in this project guide:


Crystal uPVC White Sliding Patio Doorset Left to Right with Clear Glazing
from
£978.78 Incl. VAT

Crystal uPVC Anthracite Grey Sliding Patio Doorset Left to Right with Clear Glazing
from
£1,088.35 Incl. VAT


