
Fitting a door canopy isn’t a cheap process when hiring a contractor or similar installation service. That’s why opting to install it yourself can be a good alternative with the right know-how. A canopy kit will typically have instructions to follow. However, we’ve compiled a step-by-step guide for further guidance below on how to install a canopy.
Note: Any canopy must be fixed to brickwork and any plaster or cabling is to be removed, followed by rendering, before installation.
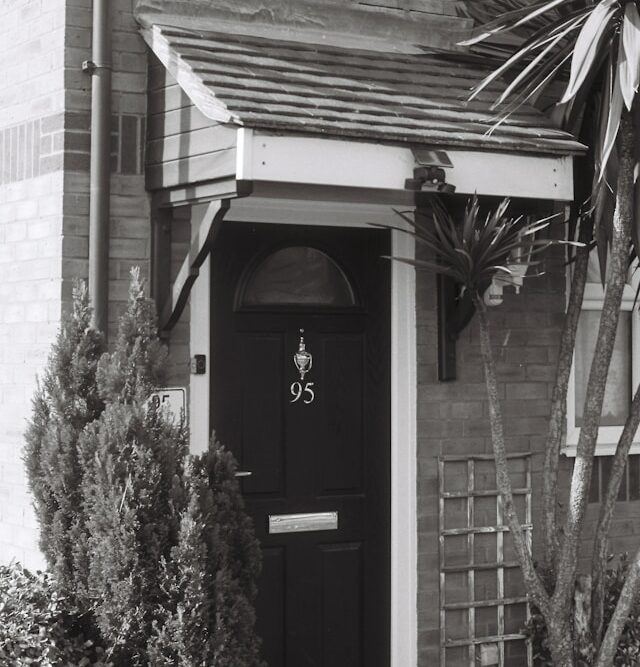
Table of contents
Polycarbonate canopy installation
What you will need
- Sheet (of your chosen colour if choosing polycarbonate)
- Aluminium tape
- Aluminium rails
- Brackets
- Hardware
- Tape measure
- Pencil
- Spirit level
- Hammer drill
- 10mm masonry bit
- Hammer
- Rubber mallet
- 13mm socket and ratchet
- Phillips screwdriver
- All-weather silicone sealant
Now onto the installation!
1) Peel back the protective film slightly around each edge on the top and the bottom of the sheet.
2) Cover the shorter sides of the sheet using aluminium tape.
3) Take your aluminium rails and attach them to the non-taped longer sides of the sheet, gently tapping them with the rubber mallet to do so.
Note: The flat side of the rail should face the top direction of the sheet.
4) Curve the sheet accordingly to insert the sheet with the tape still attached to the brackets.
Note: Use the mallet again to tap the brackets into place.
5) Secure the brackets onto the sheet with screws.
6) Using your pencil and tape measure, find and mark the centre of the door.
7) Measure the distance between the centre points of the brackets and mark this onto the wall with the pencil.
8) With the spirit level and the pencil again, mark plumb lines up from the new bracket marks on the wall.
9) To find out what height to place the canopy, hold the canopy in place and make sure to line it up with the holes and plumb lines.
10) Using your pencil, mark one of the holes as the starting point.
11) At that new mark, drill a hole and put in an anchor plug to loosely fit the bracket into place.
12) Using the level and holding the canopy in place, make sure the canopy is straight and mark the remaining attachment holes.
13) Set the canopy aside and drill into the newly made markings for the rest of the attachment holes.
14) Bring back the canopy in place and install anchor plugs into each hole to secure the canopy inset.
15) You can now peel off the plastic and use silicone sealant to seal the space between the wall and the back of the canopy.
There you have it! A new canopy is all ready for your home.
Tile-based canopy
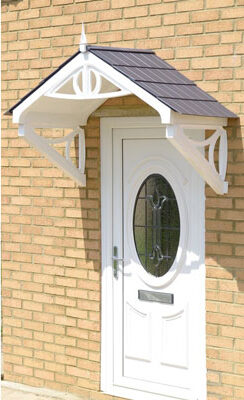
Tile canopies are, as the name suggests, canopies with a tiled surface.
What you will need:
- Pencil
- Drill
- Drill bit
- Sleeve anchors
- Canopy
- Matchboard
- 50mm galvanised nails
- Tape measure
- Underlay sheets
- Spirit level
- Desired tile
- Ventilation strips
1) Mark where the pre-existing holes are in the brackets onto the wall using a pencil.
2) Drill into the newly marked holes on the wall at approx. 200mm intervals.
3) Using sleeve anchors, attach the canopy to the wall by hammering them into the wall and using a ratchet to tighten them in place. This will help centralise the canopy.
Note: Sleeve anchors are specifically designed to work in concrete, brickwork, blockwork and even stone.
4) Mark rafter positions onto the matchboard and place the matchboard with the ‘V’ joint facing down. The upper surface should be completely flat.
5) Nail into position with the 50mm galvanised nails.
6) Measure the underlay so that it hangs over the gable ends by a couple of inches.
Note: Typically you will need about two or three underlay sheets for smaller roofs.
7) From the bottom, where the gutter will lay, fix the first length of underlay using 50mm galvanised nails (this will avoid damage to the membrane). Overlap the following layers by 150mm as this will stop water ingress.
Note: The design of your canopy roof will affect attachment options; if you want to attach the canopy to fascias and soffits, ensure you leave some loose membrane at the gutter end for easy access – find out more below here.
8) Grab two of the battens and two of the tiles then put them on the roof, but don’t fix them in place.
Note: Battens should run perpendicular to the rafters; the spacing between the battens (aka the gauge) is decided by the type of tile used. In this example, the tile referred to is a standard.
9) Install tiles from the gutter upwards because of overlap. The first tile must overhang the roof by 50mm at the gutter end. This improves water run-off into the drain.
Note: Standard 75mm overlap tiles require batten spacings should be 33.5cm and fixed with galvanised nails that penetrate each batten and membrane a minimum of 40mm
10) On the bottom row, nail the tiles into the batten being careful not to go through the membrane.
Note: As you add tiles, ensure the overhang is 45-50mm at the outer edges.
11) Nail down tiles every three rows from the bottom row of tiles, finishing with the top row nailed also.
Note: A small roof typically only needs a maximum of three rows and curved profile tiles need to be finished on the uppermost part of the curve at the overhang.
12) In the mortar or brick itself, cut a channel to attach lead flashing to the building.
13) Cut the length of the lead to the width needed and lay it on top of the roof canopy, manipulating it so an edge is secured into the groove and fixed with wooden wedges or H-clips.
14) Take a lead beater and follow the profile of the tiles to ensure the lead sits in place and point up the groove with mortar.
15)If the wood is not treated, you will need to treat the wood with varnish to ensure it has a lower risk of rot.
Bonus tip: The style of the canopy, as mentioned, affects whether it will need to be fitted to the fascia and soffit.
Place the soffits under the rafters at the gutter end.
Place the eaves protection boards under the roofing membrane as this will prevent ponding, allowing rainwater to run off into the gutter.
Fit ventilation strips to the upper edge of the fascias; attach the fascias to the rafter ends.
General door canopy fitting instructions
1) Using a pencil, mark holes at approximately 200mm along the canopy lead effect fixing flange.
2) Drill 6mm holes, where marked, accordingly.
3) Place the canopy against the wall. Ensure it is centred above the door opening
4) Skip this step if you aren’t fitting brackets.
If fitting brackets, mark on the wall where the brackets are to be fixed. Ensure these marks are straight and level, then pre-drill the fixing holes in the new marks for the brackets.
5) Place one of the brackets against the wall on one side of the door opening then, using a 7mm masonry drill bit, drill and plug the wall. Repeat this with the second bracket on the other side of the door opening, making sure they line up.
6) Following this, screw the brackets into the wall using screws and screw caps. Typically these will be supplied with the canopy kit.
7) Take the canopy and place it onto the bracket, making sure it is as central over the door opening as possible, then drill and plug the wall with screws and plugs.
Note: The brackets must be fixed to the canopy prior to the flange being fixed on the wall.
8) Screw through brackets into the canopy as this will pull it tight.
9) Seal any gaps with a good quality sealant.
10) Cover all visible screw heads with screw caps. Preferably those that match the colour of the canopy and brackets.
11) Using screws, fix the canopy to where the pre-drilled holes as mentioned in step one in the lead effect flange to the wall. You can once again cover visible screw heads with screw caps.
Before you go, why not find some inspiration from our front door canopy ideas guide?

Was this guide useful?
Mentioned in this project guide:


