6th March 2024
Fitting skirting board to match your internal doors can be made simple with the right know-how. Here are steps to help you fit your skirting board in place.
Table of contents:
Planning to fit the skirting board
Before you fit the skirting board, make sure you know what you’re going to need to install by planning the sections accordingly.
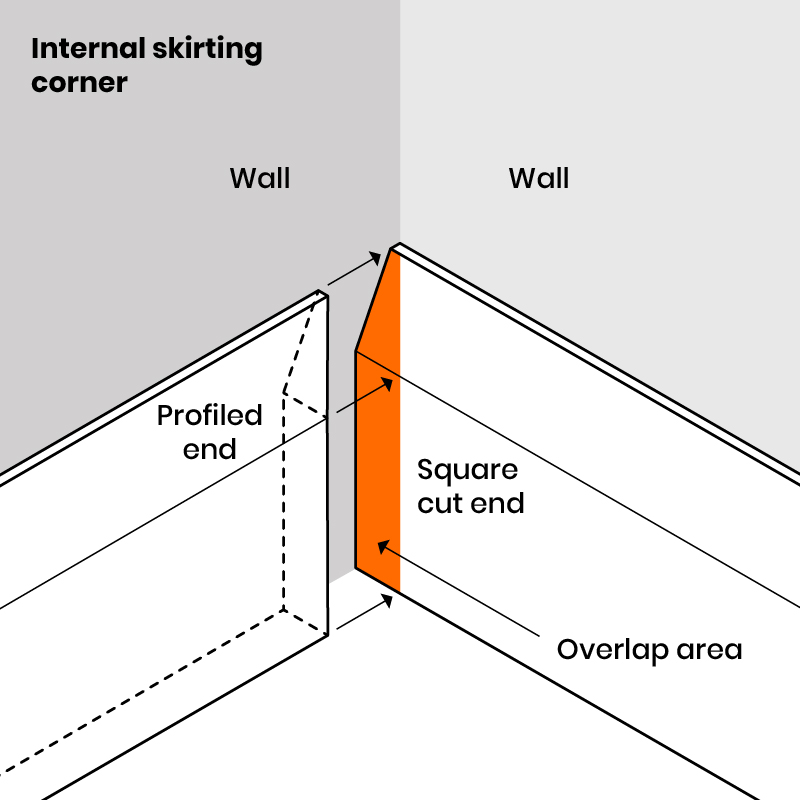
Step one: Know how to join the skirting in the corners. The most common are internal (inward-facing) and external (outward-facing) joints.
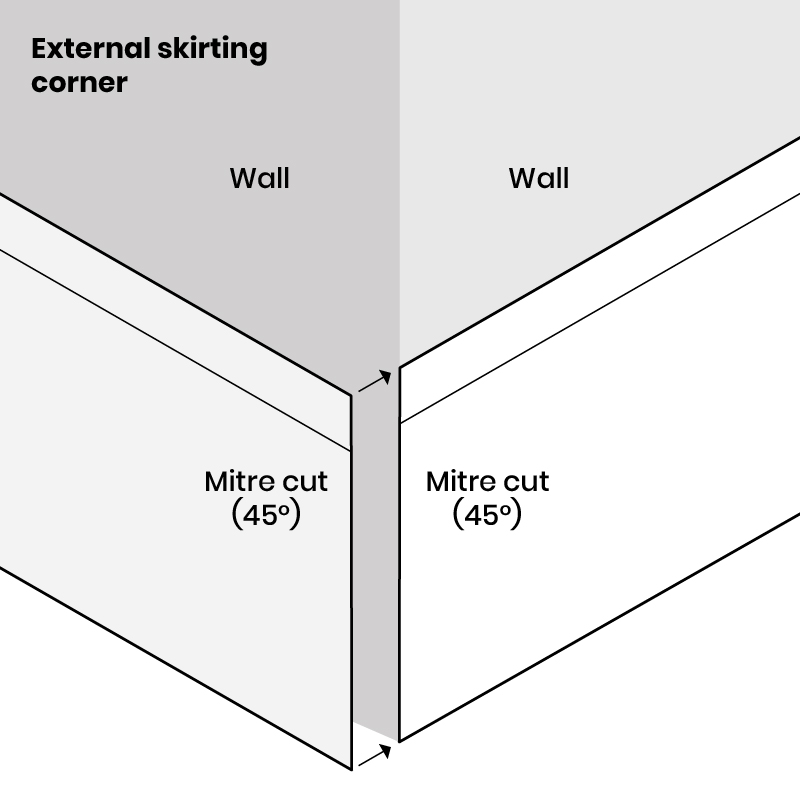
If you choose external corners, you will need to use a mitre saw (manual or electric) during the cutting stage to ensure a continuous shape around a corner.
Step two: On the backside of the skirting, mark where the corner will be and make a temporary mark of what angle the cut will be.
Cutting the skirting board
Once you have marked where the skirting will be cut, you can prepare to cut the skirting. For cutting a single piece for a one-end profile cut and outer end square cut, cut the profile cut first. This will be easier to mark for a squared cut. If cutting a longer piece of skirting, this will require temporary support at the opposite end to avoid cutting a wonky line.
Step one: Cut your skirting boards to the desired lengths needed. Internal and external corners (as seen below) will need special cuts. Ensuring they fit in place for a smooth and continuous look:
- Internal skirting board corners: Add a profile cut to one end of the skirting board piece that will sit in the corner and a scribed joint to the other end. A scribed joint is one part of the skirting board cut square, while the end of the other piece of skirting board is shaped to the skirting board’s profile using a mitre box. For the other end, ensure it can fit into the newly made groove.
- Similar to forming an internal mitre joint, use the mitre box and carefully cut the end of the skirting board to have a profiled end. This can be cut against using a coping saw or jigsaw.
- External skirting board corners: Use the mitre saw to cut a 45° angle so that the skirting fits around the wall as closely as possible.
Note: Put the front face of the skirting board towards you when sawing into it to prevent damage and hold it firmly in place when cutting.
Step two: After cutting the board, clean the cut surface by sanding it down with fine sandpaper. Test the joint is a tight fit as gaps in joints can prevent a clean fit. Make sure to note where the joint is being prevented from fitting in.
For any gaps, you can use a block pane or sharp chisel to shave small amounts of skirting off to ensure a close-fitting gap.
These particular cuts will ensure that the profile piece can be pushed in place, facing the square-cut skirting board piece.
Step three: Set out the scribed joints. This will ensure you don’t need to cut the profile on one piece of skirting board.
Fitting the skirting board
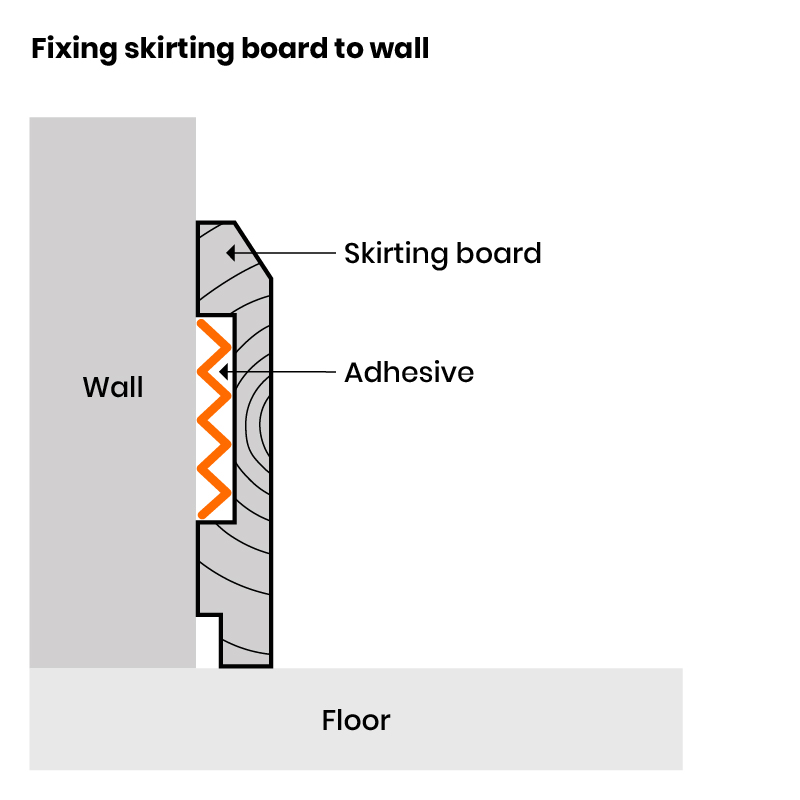
Traditionally skirting boards would have needed the use of nails or screws in a continuous line across the front face of the skirting. However, this can be a messy solution, as well as expensive due to additional tools. So a modern adhesive solution can be used in place of it and has been a favoured solution since its first usage.
It’s also worth noting how you fit the skirting to the wall will depend on the type of wall, but this is typically covered in the beginning step before moving to a normal installation Here’s what you need for:
Masonry walls
- Masonry nails or screws
- Wall plugs
- Masking tape
- Drill
- Hammer
- Skirting colour filler
Timber stud partition walls
- Stud detector to locate studs
- Lost head nails
- Hammer
- Skirting colour filler
Metal stud partition walls
- Zinc coated or plated screws
- Masking tape
- Drill
- Skirting colour filler
Optional
- Gap filling grab adhesive
Once you have what you need, here are steps to guide you forward for the full installation
Step one: Fill any cavities in the walls with an infill board.
Step two: Make sure to check for any piping or cables hidden behind the wall where you plan to fix the skirting. Adjust fixing marks as needed if there are any in the way.
Step three: Fitting the skirting board in place can be done with one of two methods:
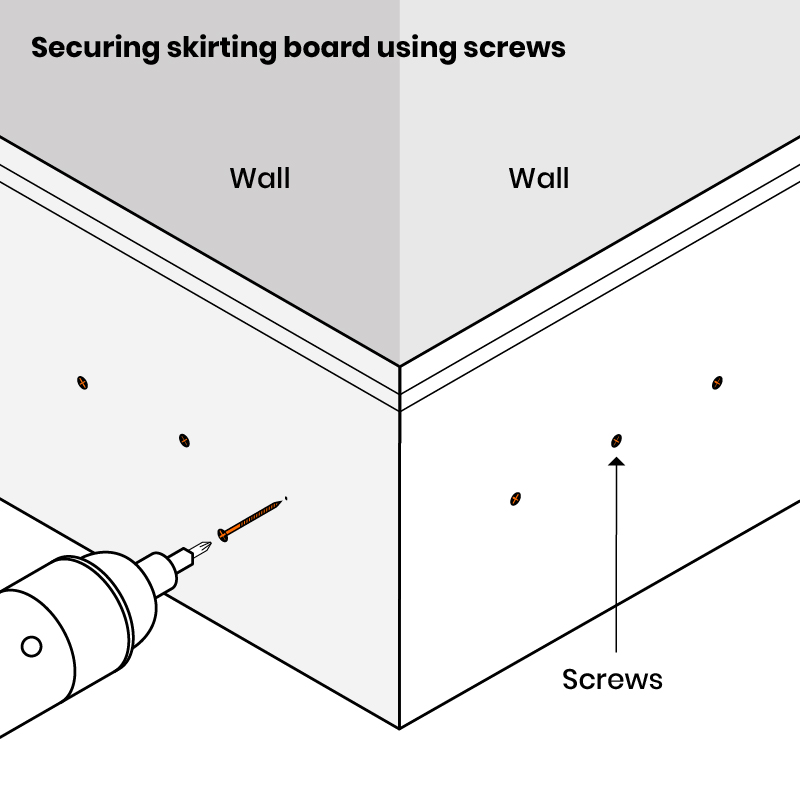
- Screws and nails: Using screws or nails continuously across the front face of the board is the method of choice. The issue with this is that it can be messy and expensive. This is due to the number of tools needed for the tasks. Follow the steps for a secure screw and nail installation here.
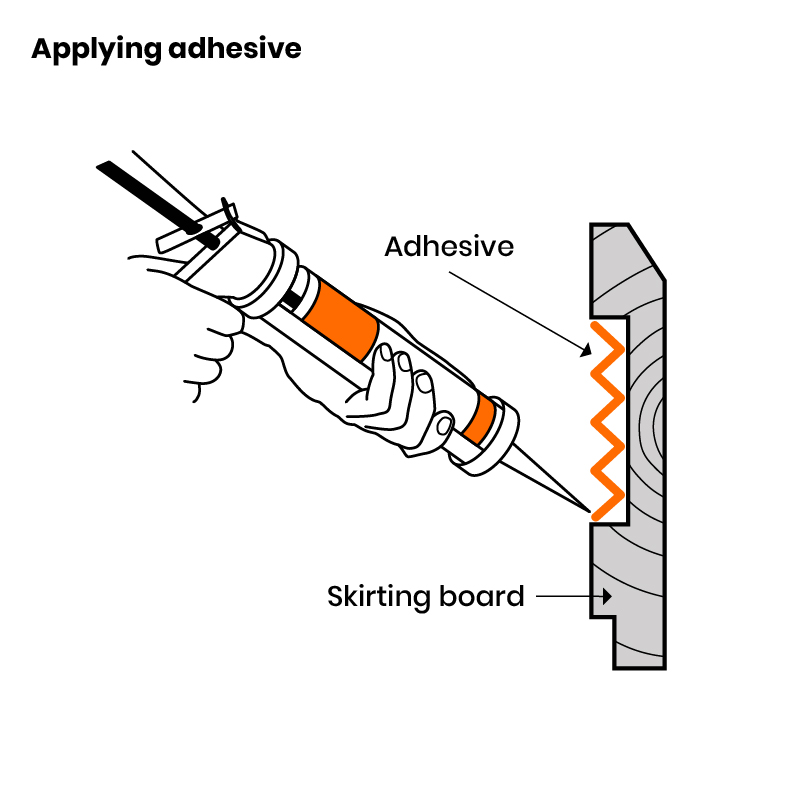
- Adhesive: The alternative method is the modern adhesive solution. Typically because it is easier to carry out. Spread this across the back of the skirting board and fix it in place on the wall. If your wall has a bow in it or you want a more secure fitting, consider placing any additional screw fixings just to ensure it is against the wall.
How to fit skirting board with screws and nails
Step one: When fixing locations have been marked, drill pilot holes into the skirting board with a wood drill bit and place a countersink bit to create a countersink in the fixing holes as you go.
Note: Countersinks need to be deep and large to ensure the screw head can be below the skirting board face.
Step five: Hold the skirting board in position; use the screw holes to make marks on the walls.
Step six: Take your masking tape and wrap it around your drill – this wrapping will need to be as long as the length of the wall plug. It will be used to help you identify when to stop drilling.
Step seven: Drill holes in the wall and insert the wall plugs in place. These need to be flush with the wall so gently tapping them into place can help.
Step eight: Screw your skirting board to the wall and fill any random holes with filler that matches the skirting colour.
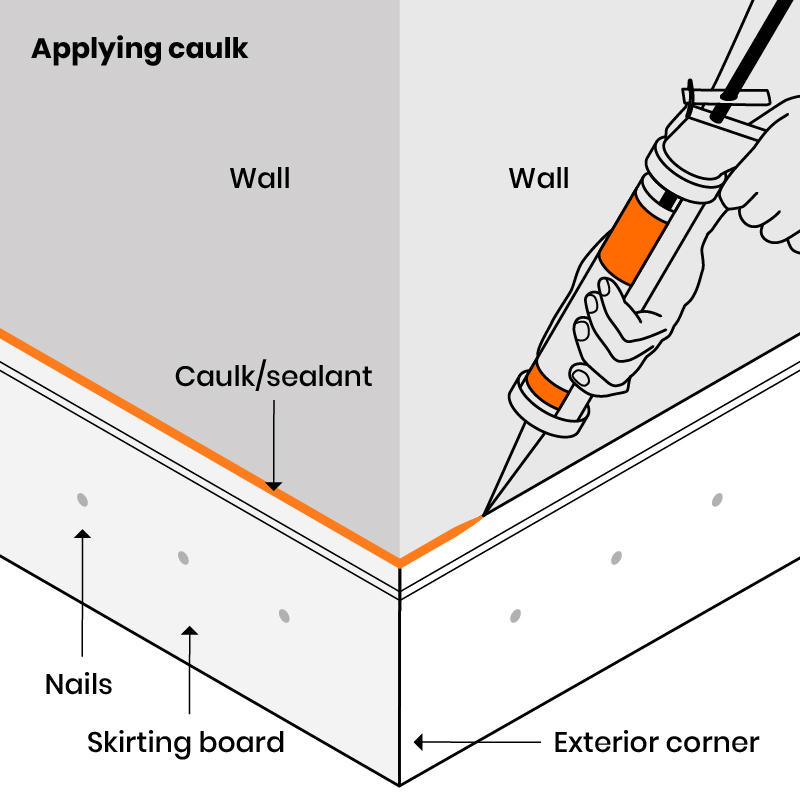
Step nine: Place flexible decorative calk in a mastic gun and seal the gap between the top of the skirting board and the wall. Running a damp cloth along the join can help smooth the appearance for a finer, cleaner look.
If you want to replace your skirting board, check out our ‘How to repair and replace skirting board guide‘.

Was this guide useful?
Mentioned in this project guide:


