Tidying up a tired-looking room doesn’t have to be limited to full makeovers. Simply improving on something minor can make all the difference; that’s where replacing skirting board comes in!
Table of contents
- What is skirting board?
- Why should you replace skirting board?
- Removing skirting board
- Replacing the skirting board
What is the skirting board?
You’ll most likely know the skirting board as the fancy edge that is usually placed across the bottom of the wall. Its actual purpose is to cover the joints between the wall and the floor and protect it from minor damage.
The skirting is usually white or typically left in a wooden colour to match the internal doors but isn’t limited to a specific colour. The design can also be varied in height, thickness and style. Check out our range of skirting to get an idea of the type of skirting you can have on your property.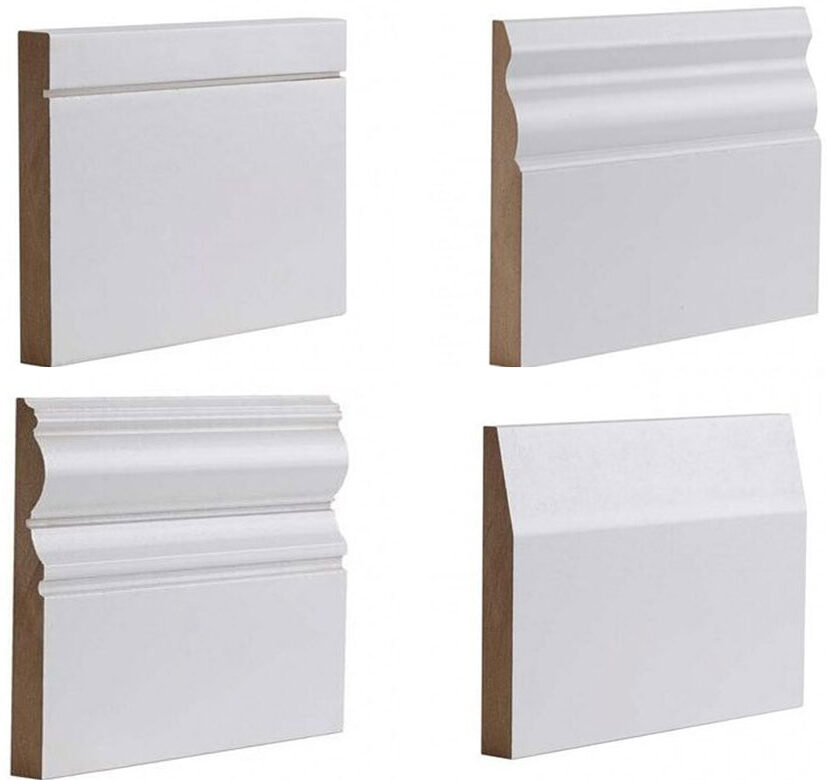
Why should you replace skirting board?
Simply put, replacing the skirting board means less mess! Unlike sanding out the marks or paint, you can have a fresh new skirting board without having to deal with the need to do a mass tidy following it.
How do I remove skirting board?
If you’re removing skirting board to replace it, make repairs or other, this guide can be a great supporting tool. Here are the simple steps to ensure you’re set to remove your skirting board with success:
What do you need?
- Chisel
- Claw hammer
- Crowbar
- Stanley
- Pliers
- Spare wood (optional)
Step 1:
Make sure that the workspace is clear of any wiring, cables or any other obstructions. Not only can these get in the way of your removal, but they could also be damaged during the removal; this could add to any existing house issues!
Keep in mind a modern skirting board might hide the cables or wires in the recess of the skirting, making them much harder to spot!
Step 2:
Skirting is usually finished with some form of sealant or caulking along the top of the skirting board. This can be removed easily with the help of a Stanley knife. Take care when removing, getting the knife as close to the top of the sealant as you can, if you’re not planning to decorate the wall behind.
Step 3:
Use a hammer and chisel to carefully knock between the wall and the top of the skirting. This should be done at six to ten-inch intervals along the skirting board until it begins to loosen.
Gently begin to pull the skirting board away from the wall. Most skirting board is typically glued, pinned or nailed to the wall and as such will need to have a little force to ensure it comes off the wall.
If the skirting board is stuck in place, the easiest way to remove the skirting board in its entirety will be using a crowbar.
Top tip: If using a crowbar, place a thin piece of wooden board (a spare piece works just as well!) between the wall and the crowbar as this will save the wall from taking the pressure and being damaged by the crowbar.
Step 4:
Once the board has been removed completely, remove any leftover glue, nails, pins or any debris for a clean space. Be aware that, if you choose to hammer in the nails if they’re too stubborn to be removed, pipes might be within the wall.
4. How do I replace skirting board?
Check the above to find out how to remove skirting board if you haven’t already done so.
This guide will advise you on how to implement a fresh new white skirting board in quick, easy steps. The option to go with white will make the room look bigger and give the room that much-needed ‘looked after’ appearance. You can go for a plain half-splayed skirting or something more detailed like the Ulysses skirting. Once you’re set on a design choice, obtain the amount needed for the room and you can begin:
Step 1: Cutting the skirting board
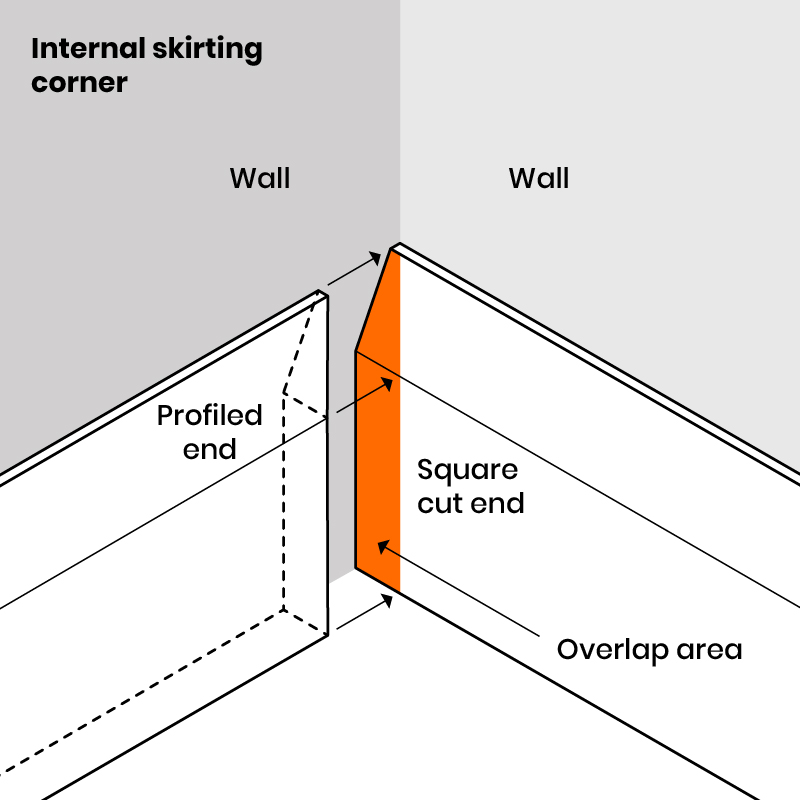
Cut to the desired lengths needed. For internal and external corners (as seen below) you will need to do special cuts to ensure they fit suitably in place and provide a smooth appearance. For the internal corner, make sure you add a profile cut to one end of one piece of skirting board that will be sitting in the corner; for the other, make sure it can fit into the newly made groove as shown below.
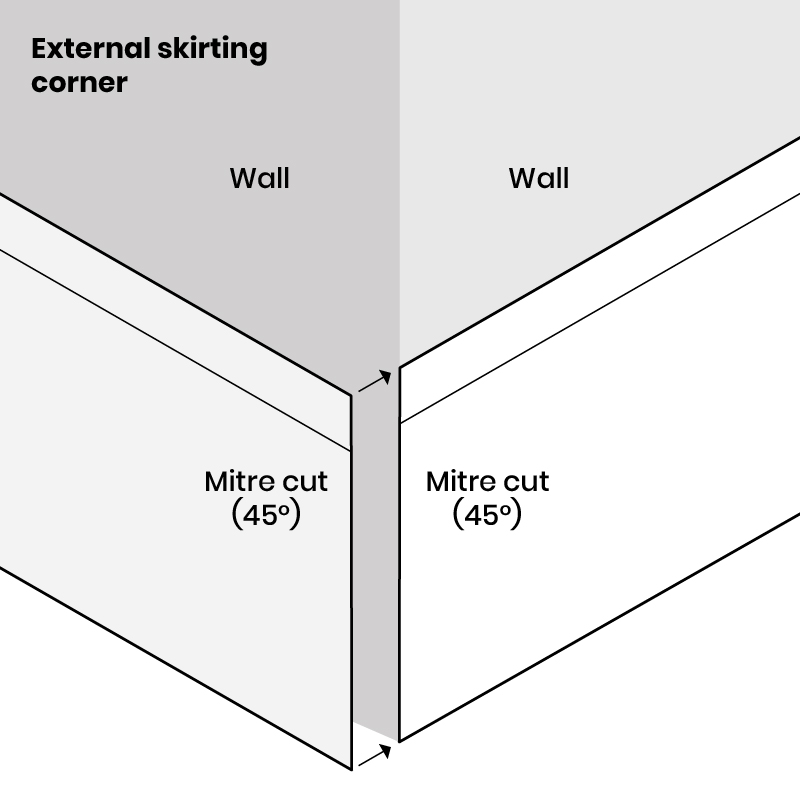
For the external corner, make sure that you make a mitre cut of 45° so that the skirting fits around the wall as closely as possible (as seen below).
Step 2: Installing the skirting board
The traditional method of installation when it comes to fixing the skirting in place requires the use of nails or screws continuously going across the front face of the skirting. However, this can get quite messy and expensive when taking into consideration the number of additional tools you need to complete the task. That’s why the modern adhesive solution is favoured by most.
Simply spread the adhesive on the back of the skirting board and gently fix it in place on the wall. This can be ideal for those who want to stain or varnish the skirting.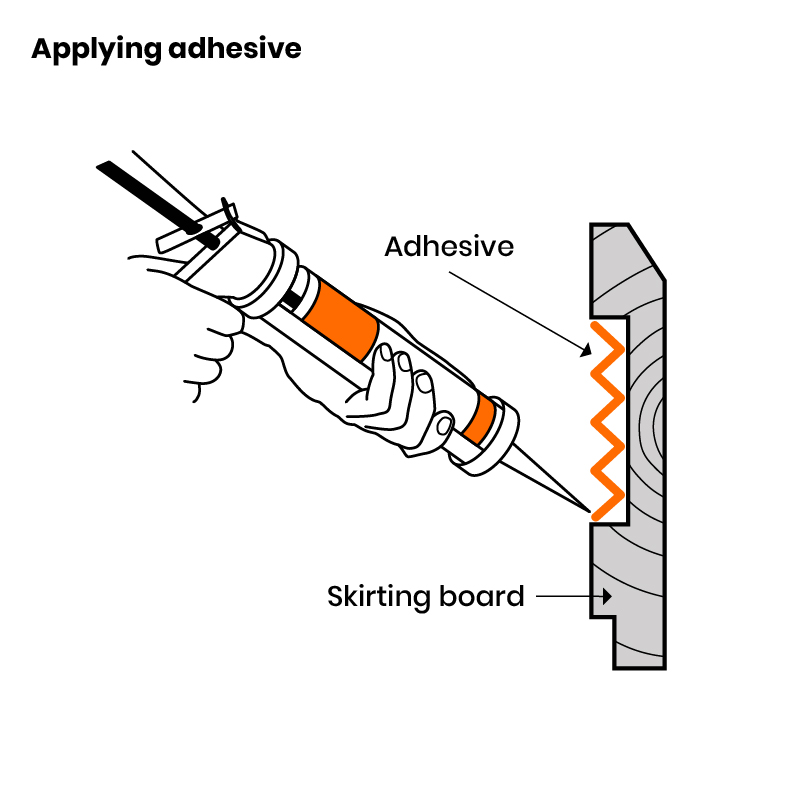
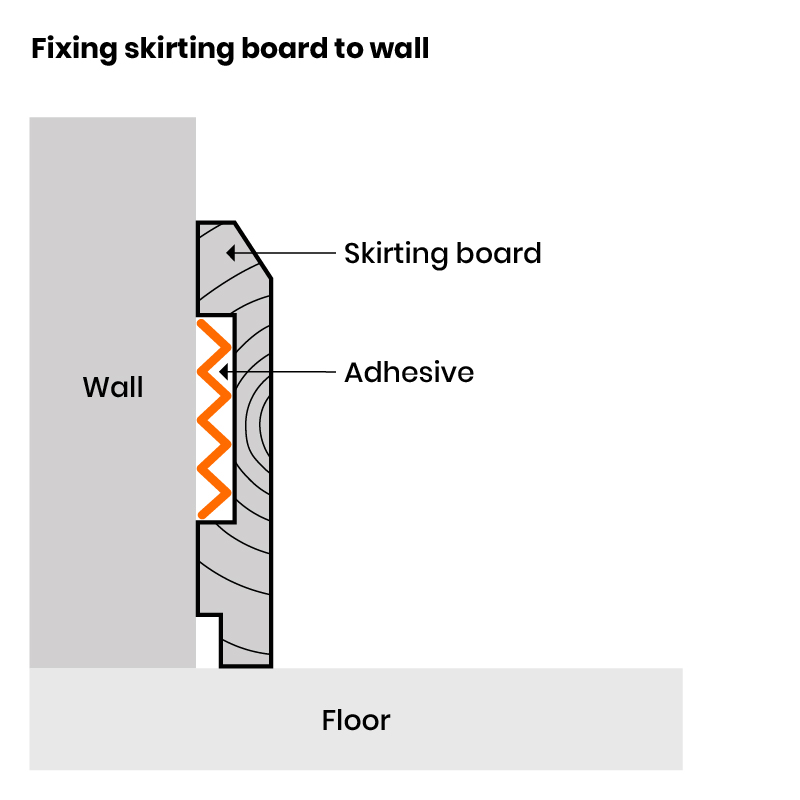
Typically if you want to secure the installation with more than just adhesive, you may want to add screws or nails across the wall, then add filler in the spaces where possible to cover the obvious fixings and their markings.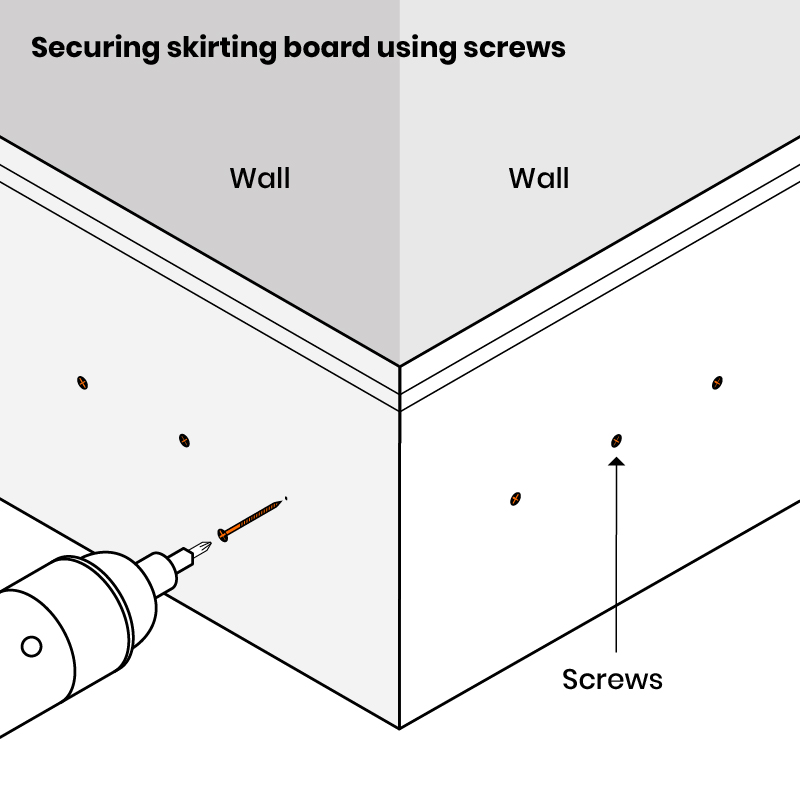
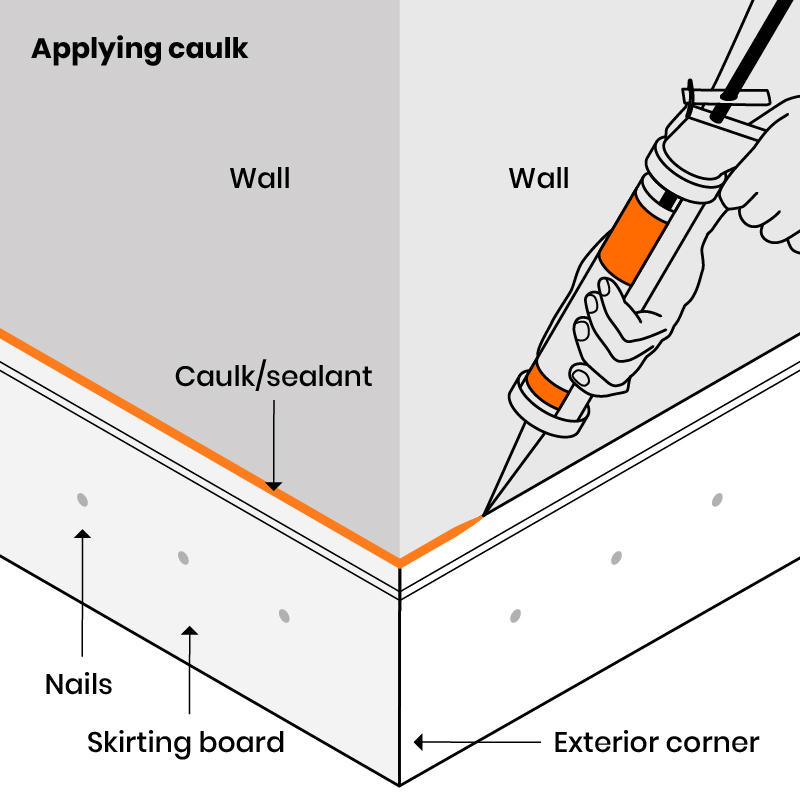
Make sure all external corners have been fixed to the walls as necessary.
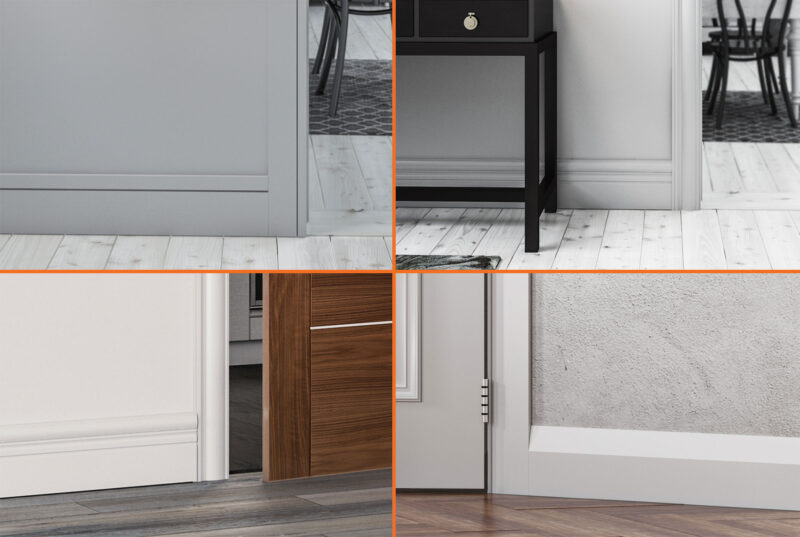
Want to match your new skirting with your door’s architrave, check out the available range of architraves here at Door Superstore. Take a look at our ‘How to fit architrave‘ guide.


