
20th March 2026
Scratched, scuffed or even old-design skirting boards just not cutting it anymore? You’re in luck because you can remove that skirting and replace it with a fresh new look! Alternatively, this allows you to opt for no skirting and instead opt for fresh wallpapering or painting of your walls.
No matter your plans, here’s how to remove the old skirting board.
Table of contents
How to remove skirting boards
Removing the skirting board gives many opportunities when it comes to redesigning. Regardless of whether you’re planning to replace the skirting board or simply remove it to reveal the wall behind, you need to follow steps to ensure they are removed with minimal damage to the walls.
What you will need
- Chisel
- Claw hammer
- Spare block of wood
- Pliers
- Stanley knife
- Crowbar
Step one: Make sure the space is free from anything that could obstruct your working space.
Cables are likely to be secured along the top of older skirting boards and should be removed ASAP before moving forward with the steps.
Modern skirting can hide cables within a specially cut space or “rebate” of the board. These will have to be dealt with further on in the process.
You can also place some protective cloth or a plastic sheet down on the floor to prevent damage to the surface.
Step two: Gently loosen any caulking or sealant across the top of the skirting. Use a Stanley knife to do so, running (aka scoring) it along the seal between the skirting board and the wall.
Do your best not to damage existing décor if you’re not planning to re-paint or re-decorate. A tip to do so is to get as close to the top of the sealant as possible. This reduces the risk of pulling any paint or paper off the walls along with the sealant.
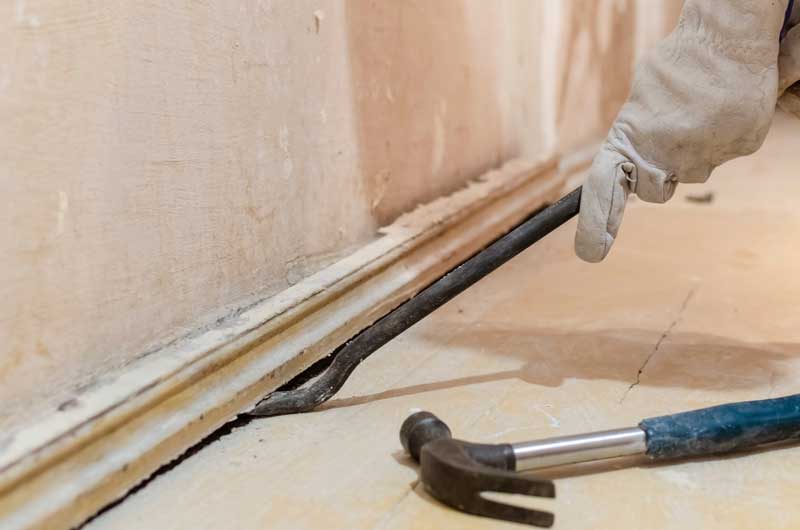
Step three: Gently pry the now loosened skirting away from the wall by carefully knocking the chisel between the wall and the skirting’s top with a hammer. Do this at intervals across the skirting until it is loose enough to pull away.
Sometimes you may need a crowbar to pry it better from the wall. However, if doing so, it’s wise to place a thin block of wood between the crowbar and the wall. This can help reduce the damage to the wall from the pressure of the crowbar pushing against it as you pry the skirting away.
Step four: Use pliers to remove any leftover nails or pins in the wall. If some are hard to pull or need a claw hammer to remove, place a block of wood against the wall to protect it from damage.
Alternatively, if the nails definitely won’t budge, hammer these in so they are flush with the wall. You will have to make sure that there are no pipes inside the wall before doing so because hammering the nails in can risk puncturing the system.
Step five: Clear up any of the debris left over from the removal. Once chipped wood, nails, dust, dirt and any other waste are removed, you can work with the space as needed.
Voila! No skirting boards, so what now?
If you’re planning to put new skirting boards in, check out ‘How to fit skirting boards‘ and take a look at our ‘Skirting board buyer’s guide‘ to find out more about the different types to choose from. You should also take a peek at our guide about ‘How to cut skirting boards‘ for advice about cutting boards to fit around corners.
We also have a replacement guide about ‘how to replace faded or scuffed skirting boards‘ if needed.

Was this guide useful?
Mentioned in this project guide:


