Whether you’re a seasoned DIY enthusiast or a beginner in the realm of home improvement, understanding the intricacies of fitting a butt hinge to an external door or interior door is crucial for ensuring smooth door operation and long-lasting functionality. In this article, we’ll take you through a step-by-step process, accompanied by clear instructions and helpful tips, to simplify the daunting task of fitting a butt hinge. From selecting the right tools to precise measurements and alignment techniques, we’ve got you covered.
Let’s dive into this how to fit a door hinge guide and unlock the secrets to achieving seamless door functionality and enhancing the aesthetics of your living space!
Table of contents:
How to fit a butt hinge
To get you started on how to fit a butt hinge, here’s what you’ll need.
What you will need
- Butt hinge
- Pencil
- Steel screws
- Utility knife
- Straight-cutting bit
- Bevel-edged chisel
- Nails
- Cordless drill
- Drill bit
- Glue

Step-by-step guide on how to fit a butt hinge
Here are the following steps to help you install a hinge. Make sure to use the hinge as a guide; especially during the measurement stages.
Step 1
Make the first marking gauge for the width of the hinge around 1/32 inches from the centerline of the hinge’s knuckle. To ensure you know when to stop the marking gauge cut, use light pencil lines at the end of the mortise.
Step 2
Lay out the second width marking by setting the mortise width a little less than the width of the leaf to the centre of the hinge pin. This will make the pin and knuckle protrude slightly.
Note: Sometimes mortising the case or frame first can make the case pieces easier to work with before being glued and transferred to the door later. Typically this can be more useful for larger cabinets or similar.
Step 3
Make the second marking gauge for the depth of the mortise. If the hinge’s leaves are tapered, set the gauge to the thickest point.
Step 4
Layout the second depth marking gauge by making fine lines using a sharp pencil and dragging it along the scribed lines. Heavier cuts can cause a less precise mortise.
Note: When marking close to the edge of the stock, use a smaller and more precise marking gauge for more detailed works.
Step 5
Hold the hinge where it is going to be put and cut tick marks into the corner of the door stile. Carry these lines across the mortise with a square. Continue this scribe line with the combination square on butt hinge mortise.
Step 6
Following the width and depth marking gauges lay the hinge in position. Cut tick marks at both ends.
Note: For small cabinet hinges, extend the tick marks with a square. For larger hinges, like on doors, use the hinge to lay out the ends of the mortise.
Step 7
Remove the waste using a chisel by making a series of chopping cuts in one direction. Remove small chunks of wood in the other direction as you do so.
Step 8
Using a router, set the bit depth to the thinnest part of the hinge – staying clear of layout lines.
Note: For thinner doors, clamp an extra board to support the router base.
Step 9
Finish the mortise using a sharp chisel, chopping and paring gradually until you reach the layout lines for a suitable fit.
Note: Save the widest chisels for the final cuts.
Step 10
Mark where the centre screw will be placed, offsetting the location a little toward the back of the mortise. This will ensure the hinge leaf sits snuggle against the rear mortise wall.
Step 11
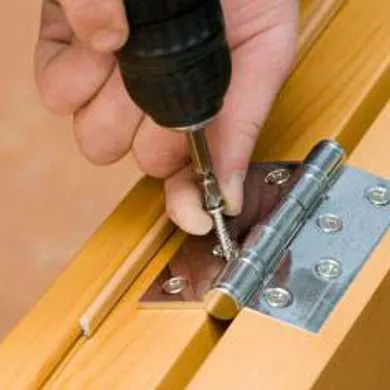
Attach the butt hinge with a steel screw. This also helps avoid damaging brass hinges. The two-hole location should be unused to allow in or outward hinge adjustments later on.
Step 12
Now to transfer the hinge locations to the case you will need to slip or wedge the door into position with the hinge fully open. Make fine knife lines along the top and bottom of the knuckle. Keeping another hinge spare of the same size can be an easy way to test the fit of the mortise and mark the screw locations.
Note: Just like the cutting stage with the door stiles, cut the mortise in the carcase the same way.
Step 13
You can finally install the door by cutting the mating mortises and attaching the door. Use the same step as you did for the door mortises and keep using one steel screw during this stage. If the door needs adjusting when you’ve put it in, remove the door to refit.
Note: Should there be a gap along the hinge line that is a bit too large or uneven, mortise one or both of the leaves of each hinge slightly deeper. If the gap is too small, you will need to adjust the hinge in or outwards.
If you need any more advice, contact us directly via our number provided or using the chat box for swift support in the bottom right.
Do you have any questions about hinges? We have all your door hinges FAQs answered.
Was this guide useful?
Mentioned in this project guide:


