You’ve made the decision to build your own double shed door, but how do you start? Well, our step-by-step guide on how to build a shed door can give you answers to that and more.
Firstly, you’ll need to know what a double shed door is. Shed double doors are similar to normal shed doors, but they are typically built for larger shed storage space and easier access to the inside of a shed. Now you know this, let’s dive deeper into their building processes!
Table of contents
- Double shed door ideas
- How to build double doors for a shed
- Double shed door hardware
- How to replace a shed door

Double shed door ideas
Each type of double shed door can be manufactured with different materials and styles that each have their benefits.
Plastic shed double doors
Plastic is a modern material used in the manufacturing of both sheds and shed doors. Part of plastic shed door maintenance includes cleaning, but simple wiping will usually suffice when it comes to plastic. So if any marks, moisture or mould appear on the door then it can easily be cleaned off.
Plastic shed doors are also lightweight, making them easy to move, open and close. What’s more, they are available in a variety of styles and colours, so you can have a unique-looking or matching shed door with the colour you want.
Metal shed double doors
Aluminium or galvanised steel are the most common types of metal shed doors on the market and can be coated or uncoated with a finish to reduce scratches and rust. Metal is an ideal material if you want improved strength and durability for your shed. Another benefit of this durability is the fact that it offers increased security. So for those of you with high-value possessions, tools, etc., a metal shed with metal doors provides improved protection.
Another key benefit is metal resistance to corrosion. As a result, less maintenance is required to keep it looking and working at peak performance.
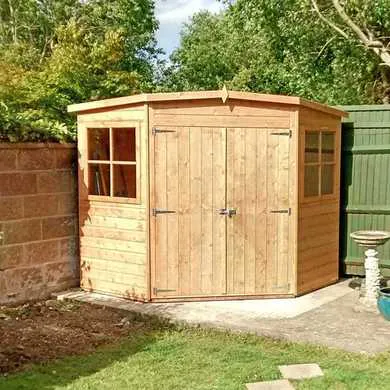
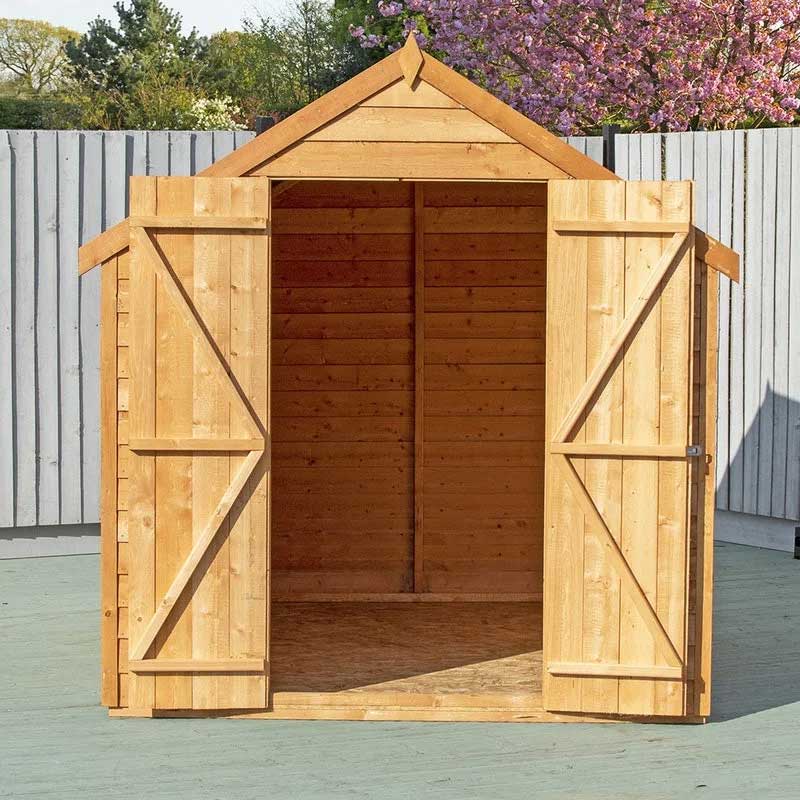
Wooden shed double doors
Wood is a commonly used material for sheds and has been for decades. When choosing a wooden shed door, you can paint, varnish or stain them, giving you lots of options for customisation. They can also be purchased with no finish to allow even more personalisation.
Today, you can choose wooden doors that are manufactured with a process called solid core construction. This is a way to improve the strength of the wood, meaning fewer concerns when it comes to harsher weather conditions, as well as a higher guarantee of a longer lifespan.
If you prefer pre-built wooden doors, you can find out more about wooden shed doors via our range at Door Superstore.

Building double doors for a shed requires some thought-out planning. Doing so ensures your finished result will function and fit as expected. Before any type of building takes place, consider the following points:
One: Decide on the width and height of the door. This will typically be decided by what purpose the shed has. For example, are you fitting larger equipment through the door or looking to carry smaller items like storage boxes through the space? Additionally, look at the height of the walls. This will be a key factor in the decision of the door’s height.
Two: A double shed door provides more versatility compared to a single shed doo and with this comes some further design options. A 48-inch width door is advised if you want to fit in larger equipment through the space. With that in mind, double doors can also be split to suit your preference. For example, you could have a 36-inch wide door space for larger objects, and a 12-inch space to allow easy day-to-day access to and from the shed.
Three: Do you want to opt for a hinged door that swings or a sliding door? If you choose a sliding door, be sure to take into account the space required inside the shed when you are opening the door.
Four: Consider if you’d prefer your door to blend in with the design of the shed or be a feature wall-type door. This is purely for appearance purposes but is worth thinking about nonetheless.
If you would prefer pre-built doors, you can view our range of shed doors for easier installation.
How to build double doors for a shed
What you will need
- Plywood (flat or tongue and groove)
- Timber boards
- Tape measure
- Table saw
- Circular saw
- Marking tool
- Wood glue
- Wood suitable adhesive
- Workbench
- Clamps
- Sandpaper
- Wood screws
Step one: Measure the shed door frame after the opening has been framed and trimmed. This will help with finding suitable measurements for your doors and help you when it comes to purchasing the amount of wood for your doors.
Step two: Using the width of the door opening, determine how much plywood you will need for the door. Ideally, the wood should be straight with as few knots as possible.
Step three: Use a table saw to cut the boards into planks to the length required. For tongue and groove plywood, trim the tongue off of one section and the groove of the other.
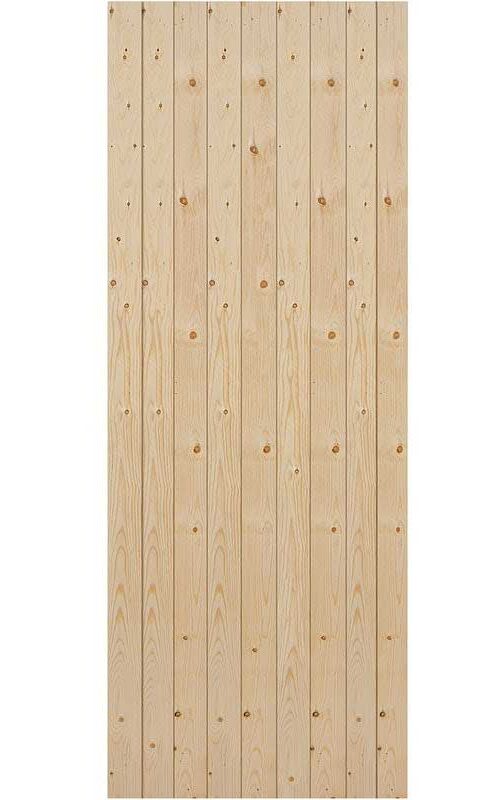
Step four: Using a workbench, lay the newly cut planks down with the outside facing downwards and test the tongue and grooves fit together. Apply a minimal amount of wood glue on a single side of the first plank in the groove and put it together with a tongue. Repeat the process until all the planks are joined together as needed via the tongue and grooves – making sure all ends are aligned and flush. The first and last boards must have the edges squared. You can now lightly clamp the planks together to ensure the glue dries as needed. Make sure that the edges are still square following the drying process and clean off any excess glue sitting outside the joining areas. These are now your door panels. You can see an example of what the panel should look like below.
Tip: Minimise potential cupping and warping by mixing the planks; this will give you an end-grain curvature that alternates in and out.
Step five: Cut six horizontal boards, the width will depend on each door’s size, and sand them down with sandpaper to smooth out any rough edges. Mark where the top horizontal board will be placed onto the back of the door panels.
Step six: Apply a suitable adhesive onto the backside of the top board (aka a rail or ledge) and attach to the marked location using suitable wooden screws. Now mark the location of the middle and bottom boards and repeat the same attachment process as the first board. The clamps can now be removed.
Step seven: Cut four boards to be split between the two doors and secured between the already fitted horizontal boards. This will include cutting a diagonal line across the top and bottom of each board to ensure a smooth fit.
Step eight: Apply the same suitable adhesive onto the backside of each board. Fitting each bottom board from the bottom to the centre and each top board from the centre to the bottom. Attach using suitable wooden screws.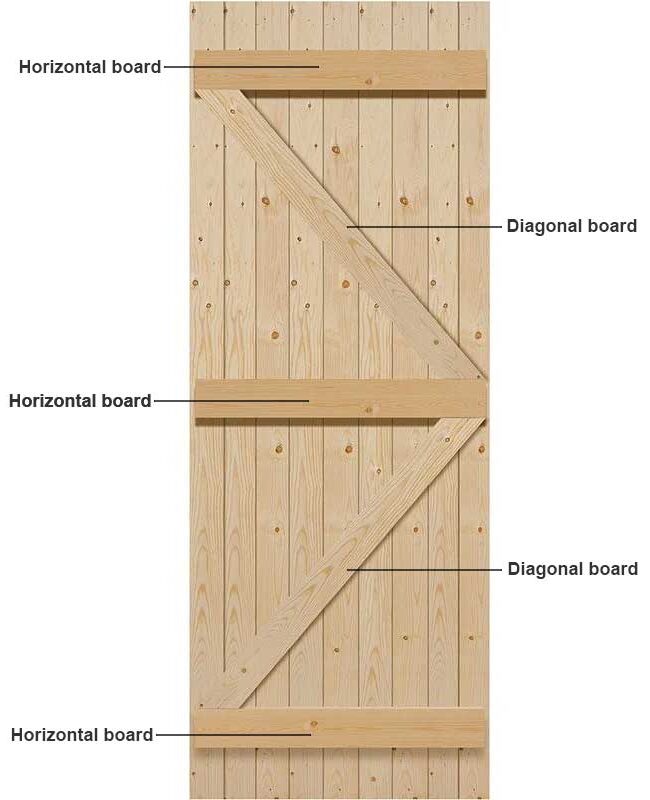
Step nine: You will need a small gap to allow the doors to open and close unless the design you have chosen has one door fixed. Mark a line across the top or bottom of each door, preferably an eight or quarter-inch inwards from the edge of the door. Using a circular saw, cut across the line using it as a guide to ensure a straight cut. You can now sand the doors down to make them look smoother and cleaner.
You have just built new shed doors! These can now be installed as they are or decorated. If you do want to decorate your doors, check out our ‘Step-by-step: How to finish, paint or varnish a door‘ guide.
Double shed door hardware
As with any type of shed door you’re going to need hardware to keep it in place and in some cases add security measures. See our shed door and gate furniture to see what you can find to match your new door and shed design. Including locks for shed double doors, hinges and much more in an array of colours, finishes and styles to suit your design requirements.
How to replace a shed door
If your shed door has come to the end of its use, you can find out what you need to do for a replacement via ‘How to replace a shed door‘.

Was this guide useful?
Mentioned in this project guide:


